Getting Started: Your First-Time Setup
Welcome, creator! This guide will walk you through the essential first steps to get your account and Discord bot up and running. The process is designed to be secure and straightforward.
Step 1: The Desktop Sync App
Your journey begins with our secure desktop application. This app is the key to creating your account sync key to verify ownership of a creator account, because it handles the initial connection to your Fansly profile locally on your computer, meaning your sensitive auth token never leaves your machine.
Download the App:
- Recommended Method: Go to the Dashboard Settings Page. The page will automatically detect your operating system (Windows, macOS, or Linux) and provide the correct download button for you.
- Manual Method: You can also download the app directly from our GitHub Releases Page.
Get Your Sync Key:
- Open the NotiFansly Sync app.
- Paste in your Fansly Authorization Token (see the easy method below for getting this).
- Click “Connect & Verify”. The app will securely connect to Fansly, confirm your profile, and then connect to our servers to generate your unique Sync Key.
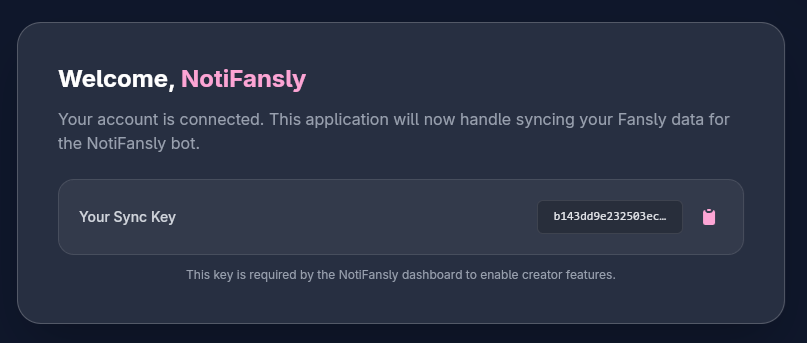
Link Your Account on the Dashboard:
- Copy the Sync Key from the desktop app.
- Go back to the Account Settings page on the dashboard.
- Paste the key into the “Sync Key” input field under the “Creator Verification” section and click Verify.
You are now a verified creator! You’ll only need to do this once. The dashboard will now recognize you and unlock creator-specific features in your server settings.
A Note on Security & Trust
We understand that your account's security is paramount. That's why the "NotiFansly Sync App" is fully open-source. You can view the entire source code on GitHub to verify that your auth token is only used to communicate directly with Fansly and is never sent to our servers.
How to Get Your Fansly Auth Token (Easy Method)
This is the fastest and most reliable way to get your token.
- Go to fansly.com, log in, and open your browser’s developer tools (usually by pressing F12, or Ctrl+Shift+I).
- Click on the “Console” tab.
- Copy and paste the entire code block below into the console, then press Enter.
console.clear();
const activeSession = localStorage.getItem("session_active_session");
const { token } = JSON.parse(activeSession);
console.log('%c➡️ Authorization_Token:', 'font-size: 14px; color: #8B5CF6; font-weight: bold;', token);
The console will print out your Authorization_Token. Copy the long string of characters and paste it into the desktop app.
Warning: Your Authorization Token provides full access to your account. Never share it with anyone.
Step 2: Configure Your Server Settings
Now for the fun part! You can customize how the bot works in any server you manage.
Go to the Dashboard: Navigate to the main Dashboard page.
Select a Server: Click on the server you want to manage from the list. This will take you to that server’s settings page.
Select Your Creator Profile: On the left side, you’ll see a list of all creators being monitored in that server. Click on your own username.
Note: If your profile isn’t being monitored yet, ask a server admin to add you using the
/addcommand or the “Add Creator” button on the dashboard.
Step 3: Configure Notifications & Role Linking
Once you’ve selected your own creator profile, you’ll see all the available settings on the right.
- Post & Livestream Notifications: Enable these toggles, choose a channel for announcements, and select an optional role to ping (e.g.,
@Notifications). You can also set custom embed colors and notification messages. - Custom Live Image: Upload a “Coming Soon” or “I’m Live!” image that will be used for your next livestream notification.
🛠️ Notification Troubleshooting
If you've saved your settings but notifications aren't appearing, check that the NotiFansly Bot has the following permissions in your chosen Discord channel:
- View Channel: If the bot can't see the channel, it can't post (Error: 403 Missing Access).
- Send Messages & Embed Links: The bot uses embeds for all alerts. These are required (Error: 403 Missing Permissions).
- Mention @everyone, @here, and All Roles: Required if you want the bot to ping your notification role.
Tip: If you recently deleted or recreated a channel, make sure to go back to the dashboard and re-select the new channel in your settings.
Fan Role Linking (Creator Feature)
Because you are a verified creator editing your own profile, you will see a special “Fan Role Linking” card.
- Follower Role: Select the role you want all your Fansly followers to get automatically when they link their accounts in this server.
- Subscriber Role: Select the role for any fan who subscribes to any of your tiers.
- Tier-Based Roles: For ultimate customization, you can map specific Discord roles to your individual Fansly subscription tiers. Make sure you have synced your data with the desktop app so your tiers appear here.
⚠️ Important: Discord Role Hierarchy
In Discord, a bot can only manage roles that are below its own highest role. For Fan Role Linking to work:
- Open your Server Settings in Discord.
- Go to the Roles tab.
- Locate the NotiFansly role and drag it so it is above all the roles you intend to give to your fans (Follower, Subscriber, etc.).
If the NotiFansly role is lower than your fan roles, the bot will receive a "Missing Permissions" error from Discord and roles will not be synced.
Once you’re done, hit “Save Changes” for the main settings, and “Save Tier Roles” for the tier-specific mappings.
Step 4: Invite Your Fans to Link!
Your bot is now ready! The final step is to let your fans know they can get their special roles.
- You can make an announcement telling them to use the
/link <their-fansly-username>command in any channel. - The bot will guide them through a secure, private verification process.
- For a detailed walkthrough you can send them, check out our Fan Linking Guide.
And that’s it! Your automated community engagement system is now active.